How To

Brined Pork Roast and Mashed Potatoes

I’m currently taking Thomas Keller’s MasterClass on cooking techniques.

Even though it’s not technically ‘wild’ cookery, I figured I’d share some of the excellent tips, tricks, and dishes that I’ve made, and will be making here.

The first one is not in the MasterClass and is something I whipped up myself after scouring the net on a ‘how to’ properly brine a pork roast. After sifting through a bunch of garbage, I found a simple way that works, which I’ll be sharing with you below.

Tonight’s supper:

Brined_Porkroast_Potatoes.jpg

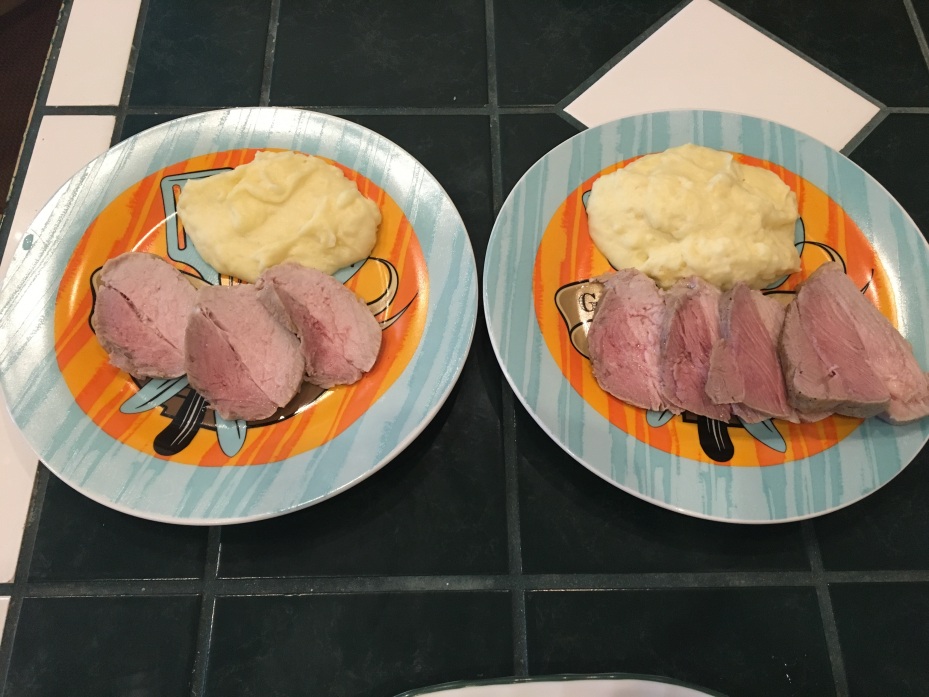
Brined Pork Roast and Mashed Potatoes. Reviews: “Succulent.” “Delicious!” “The best pork I’ve ever had!” And my favorite from my daughter: “Even better than the eggplant and garlic confit!” High praise, as that was her favorite dish ever before this. 😀

Everyone has their own way of doing this, this is what works for me. Feel free to adjust any recipe to your own preferences, as they are general guidelines only.

Everyone can figure out the mashed potatoes part with a simple internet search, so I’m just going to roll with the brined pork.

You will need:

(Brine stage)

A pork roast

1 gallon of cold water

1 dry measure cup of kosher salt

A big fricking mixing bowl and lid/plate to cover it. OR Aluminum foil.

A wooden spoon

Instructions:

This is going to brine for ten (10!) hours. Plan accordingly.

Pour the gallon of cold water into the mixing bowl, then dump the cup of kosher salt into it.

Stir until it’s 100% dissolved. If you have a kid who likes to help you cook, they’re great for this whilst you do other prep. Just have them stir SLOWLY.

Take something slim and pokey (a meat thermometer works great for this) and perforate the hell out of your pork roast on all sides, penetrating at least halfway though the meat. If you don’t have at least 50 holes on each main side of the roast, you aren’t trying hard enough.

Cover the top with lid/plate/aluminum foil.

Wait 10 hours. If you eat supper at 5 PM, yer gonna want to brine this about 6 AM.

You’ll need that extra hour for other prep.

(Cooking stage)

A 10” skillet or frying pan

Canola oil

Kosher salt

Cracked black pepper.

A roasting pan and roasting rack (A cookie sheet and cooling rack inside the cookie sheet work great for this!)

Preheat the oven to 350 degrees Fahrenheit/177 degrees Celsius.

Coat the bottom of your frying pan in a thin layer of canola oil, and set to medium high.

Heat until the oil reaches the smoke point.

Put some paper towels down on a cutting board.

Pull the roast out of the brine, rise thoroughly in cold water, then place on the paper towels, and pat dry with other paper towels. Move the roast to a plate to stage it, and replace the now soaked paper towels on the cutting board with new ones, and replace the roast on the cutting board on the new paper towels.

Let the roast set for 1 hour to come to room temperature. This is VERY important for even cooking and no weird under cooked spots in your roast.

(1 hour passes…)

Remove the paper towels from the roast, pat dry again with a new paper towel.

BPP_Set.jpg

Place the roast directly on the cutting board and season lightly with a dusting of kosher salt and cracked black pepper.

By now your oil should be hot and almost smoking.

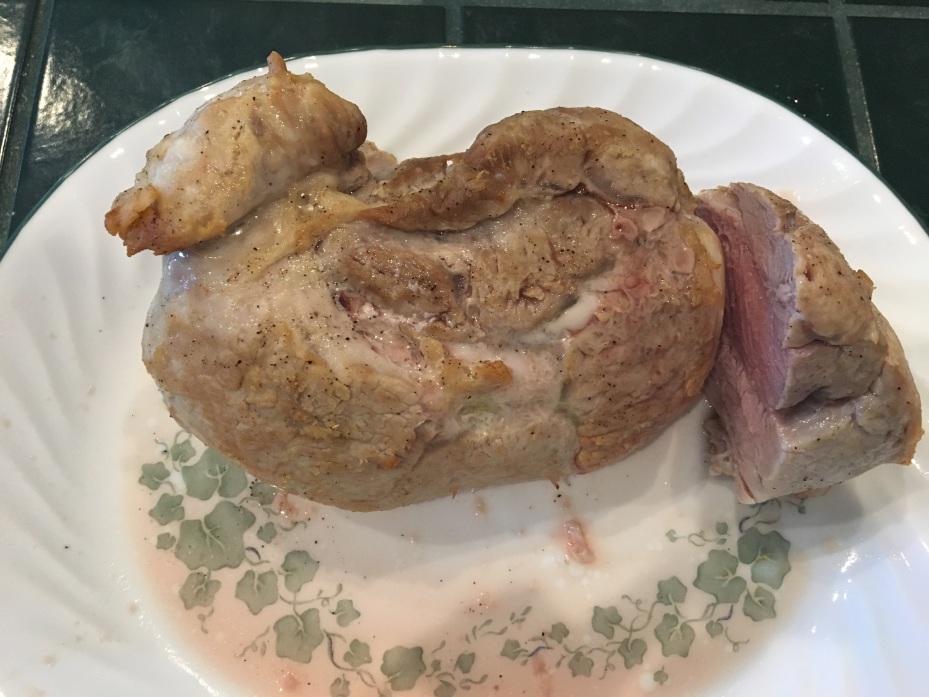
Carefully put the roast into the pan and sear it. This will only take a few minutes. Flip it over and sear the other side.

(Searing the meat will lock in some of the moisture when you roast it, as well as make a lovely outer finish on the roast.)

When it’s seared, move the roast from the frying pan/skillet into the roasting pan and then into the oven it goes.

Depending on the size of the roast, you’ll need to adjust the cooking time.

The FDA changed their pork safety guidelines quite a few years ago from 160 to 145. I typically cook it to 150, though that may be more than necessary. It’s lovely at 135 too.

We’ve all been eating overcooked tough pork all our lives, and it’s such a wonderful meat when properly prepared.

I made two roasts and one was significantly smaller than the other. The smaller was done at 35 minutes, the larger at about 50 minutes, with an internal temp of 150. Be sure to stick the thermometer into the largest portion of the meat.

BPP_Done.jpg

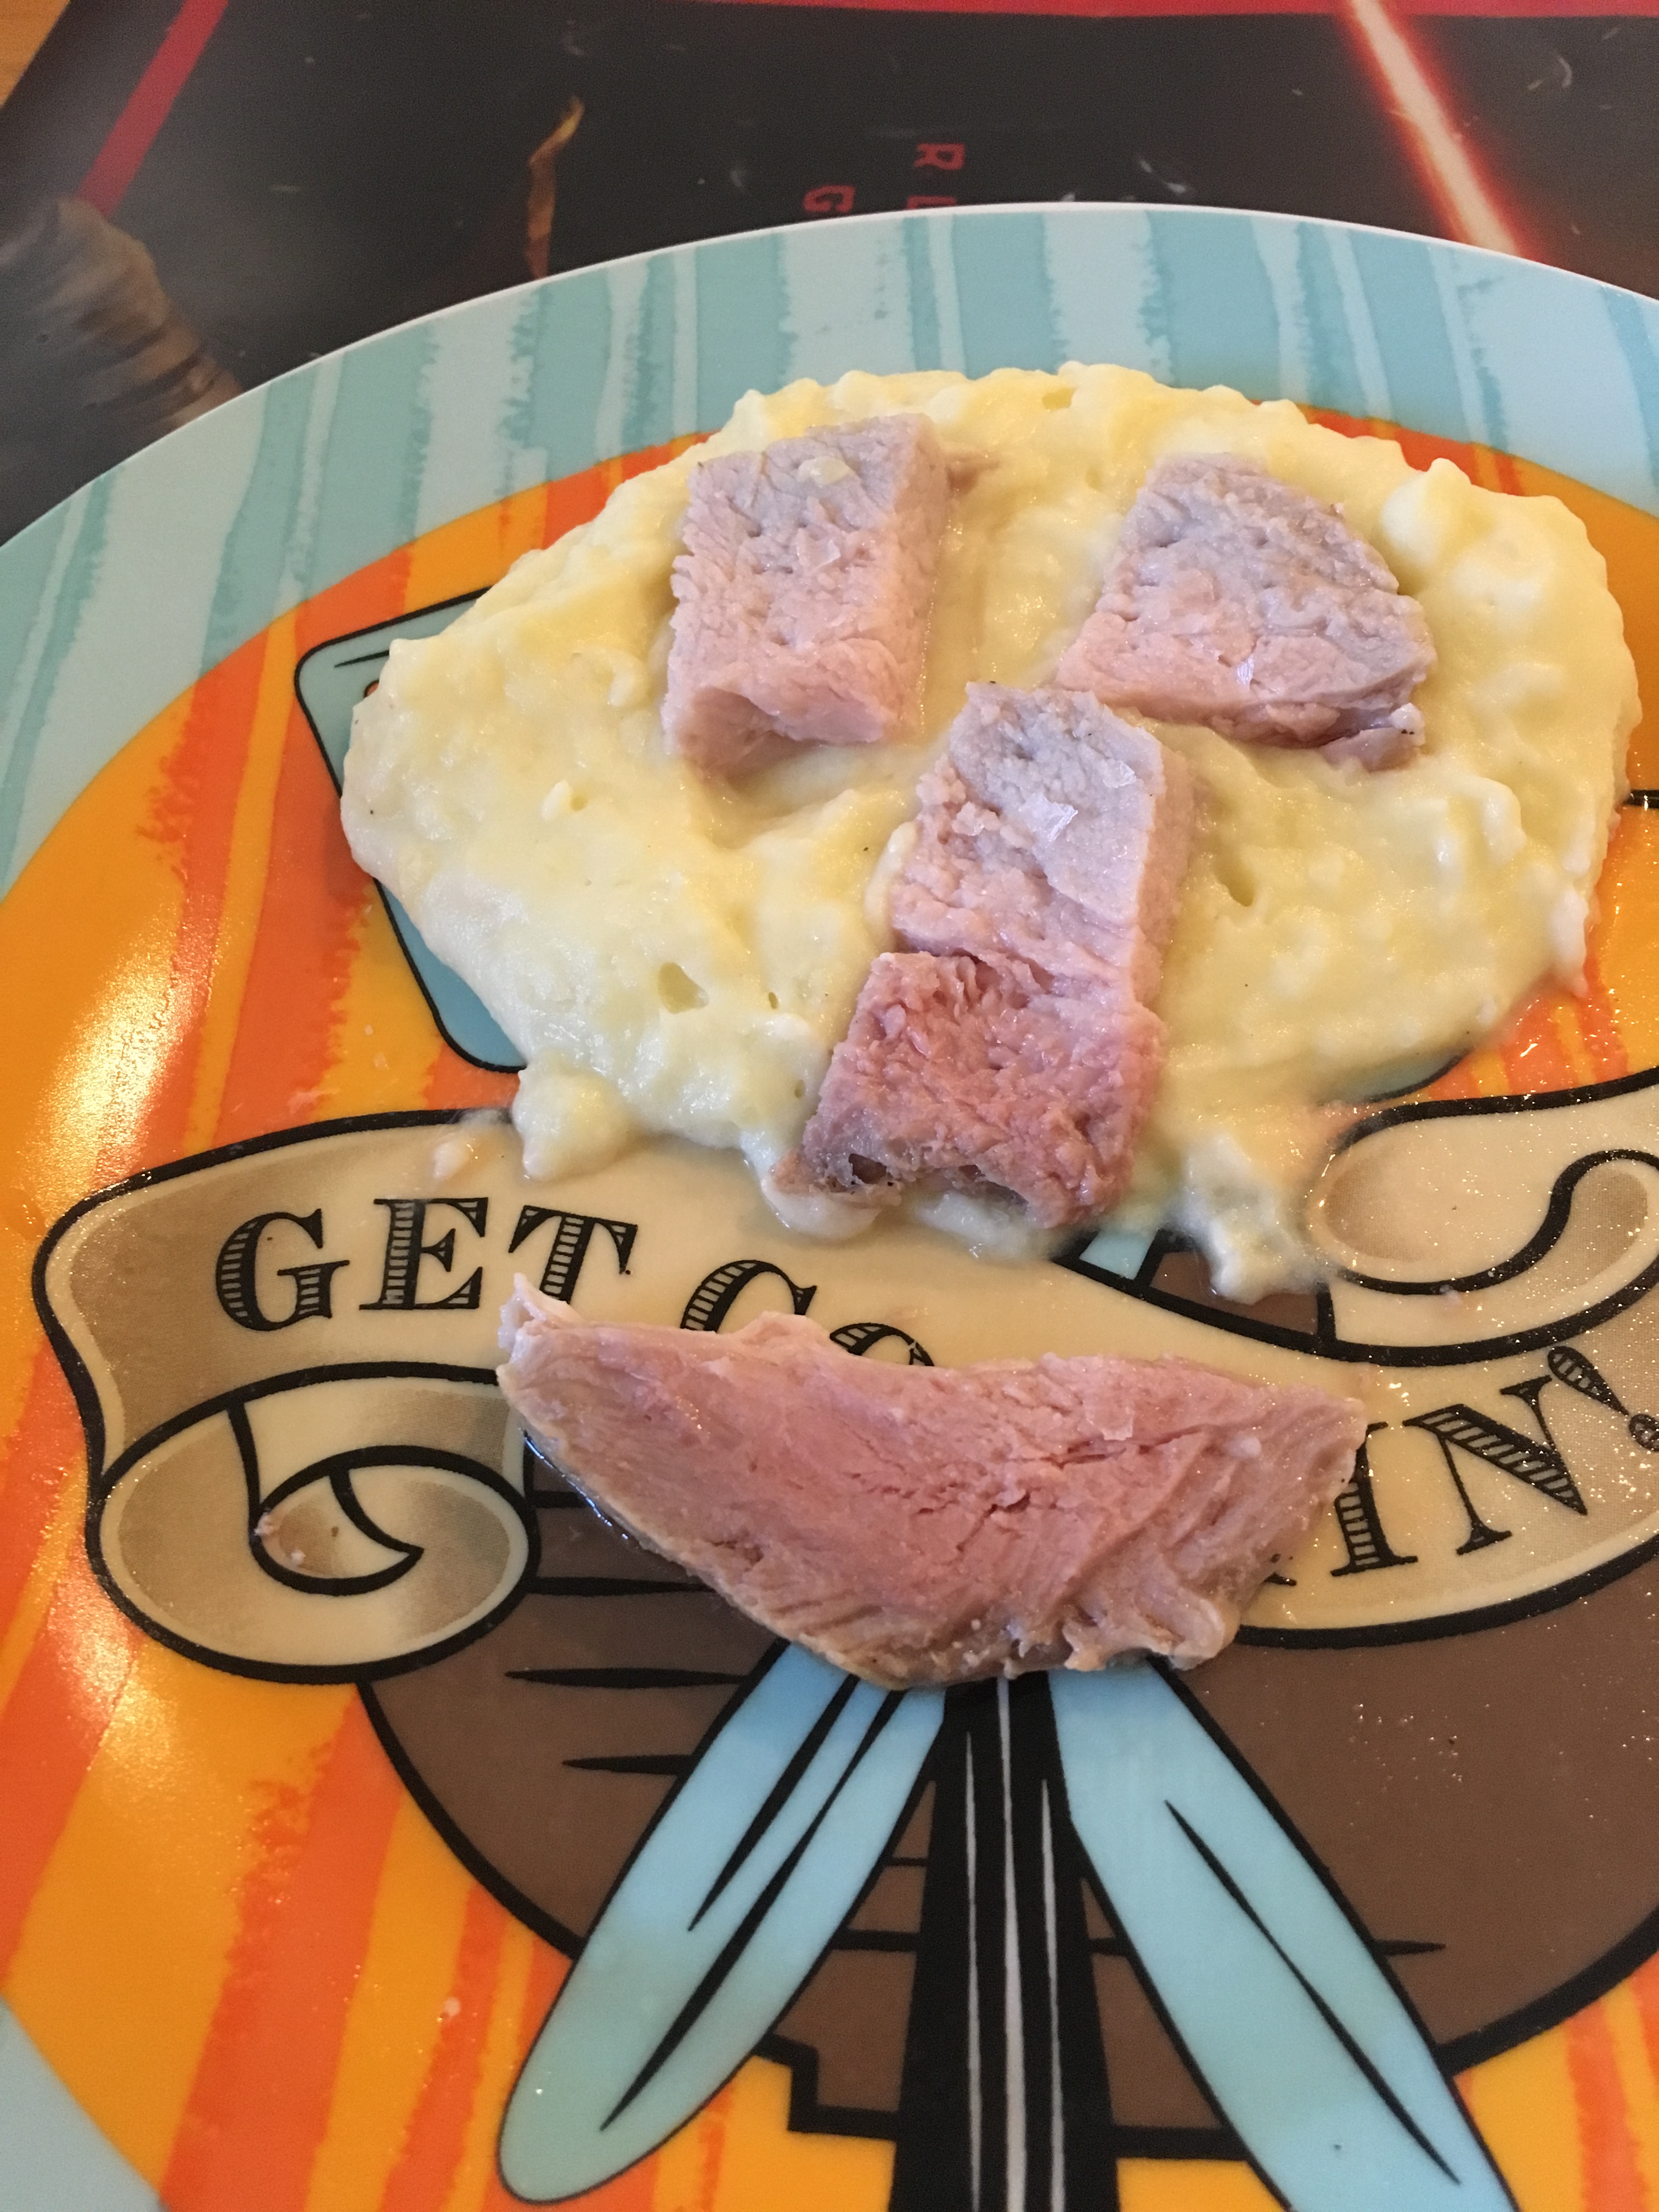
It’s pink, and it’s supposed to be! It’s also tender, juicy, and delicious. As long as your meat thermometer read 145 degrees, you are 100% safe. Enjoy pork as it was meant to be enjoyed… juicy and delicious.

Plate and enjoy!

Or, if you’re like my daughter, have fun with your pork and potatoes!

BPP_Skull.jpg

More to come soon!

As always, I can be reached at Wildcookery@yahoo.com

Categories: How To, Modern Cooking, Recipes, Uncategorized, Wild Cookery | Tags: , , , , | Leave a comment

My Next Cool Project: Chickens!

I’ve been putting quite a bit of research lately into raising my own chickens.

My wife is very happy that we’ll be growing our own meat and eggs and my daughter just LOVES chickens, and I think is even more excited and will probably be their new best friend from the day they arrive.

Raising my own food, along with foraging for wild plants, is one of those unusual things that I get REALLY excited about when I think of it. You know what I’m talking about here. The kind of thing that when you think about it, you just can’t stop thinking about it, have this huge silly looking smile plastered all over your face, and that you just want to RUN OUT and do RIGHT NOW and the speed of light.

Curbing my impulse to order 100 Bantam chicks was probably a good idea. Previous experience in this realm has told me I should take it small and be willing to make some mistakes on a small scale before trying something large that could easily get out of hand. For me, this means no more than a half dozen chicks to start with.

So, I started looking for a nice small sized coop design, and found this awesome set up:

It’s marketed for urban coops, but it can obviously be used in any environment. It looks like it will be perfect for what I need it for, to house just a few chickens. I already have, or can borrow all the necessary tools, so I’m good to go on that front. I’ll just need to get the wood, and off I go.

But then I figured that if I needed a good coop design, so might some other people. So, I partnered up with Catawba Coops to help get the word out of this awesome coop design. Whether urban or rural, this coop design will work for anyone that wants to start out with a small flock to get their wings wet.

And doing so is about as ‘Green’ and eco-friendly as it gets.

After all, growing your own chickens for eggs or meat is a very healthy rewarding activity. Also, one can get free range organic eggs and poultry for very minimal cost. There is just something about getting the best of the best at the lowest possible price that makes anyone smile! 🙂

And just think… with rising food costs all the way around, and an often tainted and unsafe food supply that has proven time and time again to be our Achilles’ heel in this country, I think the time is upon us where it would be prudent for every responsible family to have a few (3 – 5) hens in their own backyard to provide fresh eggs. On average, depending on breed, that would produce about a dozen to a dozen and a half eggs per week. My current food budget only allows me to buy two dozen eggs per MONTH, so that’s an instant upgrade of TWICE as many eggs in my family’s diet.

That’s a win-win all the way around, as far as I can see it.

This is about REAL food security. And as such, I’m more than happy to endorse and heartily promote this endeavor to bring true food security to our inner cities and rural communities alike!

Just click one of the above banners, and off you go! 🙂

Categories: Books, Buying Local, How To, Organic, Organic Meat, Preparedness, Survival | Tags: , , , , , , , , | 3 Comments

Rocket Mass Heater

This has to be the spiffiest darn thing I’ve seen in eons.

Come hell or high water, I’m building one of these bad boys this year!

Loads more info here:

http://www.richsoil.com/rocket-stove-mass-heater.jsp


Categories: How To, Preparedness, Survival, Web | Tags: , , , , , | 3 Comments

How to Make Darn Good “Old-Fashioned” Coffee

Yea, I know, it’s not ‘wild’. But it IS cookery! I use decaf organic coffee, so close enough. 😛

We’ve got a huge problem with most people not knowing how to cook these days. And it’s not their fault. No one took the time to teach them growing up. They were too busy having a ‘childhood’. Half the nice folks I talk to can’t even make real oatmeal… so here we go.

You will need:

1 medium saucepan with a lid.
Enough water to almost fill the saucepan (Leave ½” space at the top)
Your favorite ground coffee

Put the pan on the stove on medium. If you have 10 temperature settings on your burner, you’ll want to put it on a 4.

Immediately add 2 tablespoons of ground coffee to the water whilst the water is still cold. It’s very important to do it this way. You want to slowly ease the flavors out of the grounds. Not shock them. Cover the pan with the lid.

Now, you will need to attend this until you know how long it takes to boil. Approximately 15 – 20 minutes depending on your elevation. Resist the urge to put the temperature higher. You’ll just come out with crappy tasting coffee.

Now, let me define ‘boil’. Boil to me, in these coffee terms, is that bubbles are just breaking the surface. Not to be confused with a ‘roiling boil’. You aren’t making pasta here. If you can smell the coffee 4 rooms over, that’s all of your essential bean oils that are being burnt out of your coffee, and it is NOT a good thing.

So… watch your pot, and when it starts to bubble a bit, take it off the heat and set it on another burner for about 5 minutes. This will allow the grounds to settle so you can pour it off.

I pour mine into a conventional coffee pot. If you make coffee, you most likely have one of these somewhere. If not, use another equal sized or larger pan. Carefully take the lid off of the pan, being cautious not to burn yourself with the steam (IT’S HOT!) and SLOWLY pour the coffee into the coffee pot/other pan.

With practice you’ll be able to get 99% of the liquid out of this with zero grounds. But for your first try, don’t be afraid to leave some liquid in the pan, so as to be sure not to get any grounds in your coffee. The last thing you want your first taste is to get a mouthful of grounds.

Now, if you like sugar or milk in your coffee, add those as you normally would. I like to add 1 teaspoon of dark brown sugar or maple syrup to mine. It’s absolutely delicious.

Typical comments I get are “Wow!, all the bitter is gone.” And “If I knew coffee could taste this good, I’d have done this years ago!”

I’ve had people who couldn’t even drink coffee without a ton of sugar to mask the sucky bitter under-taste, go to drinking it this way… BLACK… because the vast majority of the bitter is gone. I’ve also had people who couldn’t even stand the SMELL of coffee before, (as it is typically acrid and burnt) turn into die hard coffee lovers.

Things like espresso machines totally ruin coffee. They burn the beans. The temperature is simply too high.

GOING BEAN (as opposed to ‘going green)

What would be more ‘green’ than recycling your coffee grounds? And by recycle I mean get some real use out of more than once?

Now, this isn’t the coolest part. Oh no. The coolest part is that you can re-use these grounds for about five days, and still get coffee that comes out almost as good as day 1.

Simply re-fill the pot with water to the previous level, put the lid on it, and put it back on the stove on the shut off burner. When you want more coffee, just turn the burner back on, add ONE TABLESPOON additional coffee to the existing pot, and prepare as normal.

The only reason I discard after five days is because the level of actual coffee goes down as the percentage of coffee grounds to water ratio rises. In other words, you get a little less liquid each day, because the space in the pot is taken up by coffee grounds.

The coffee doesn’t get yucky tasting under normal conditions. Though in the heat of summer I only keep it for an additional day or two if it’s really hot out. In the winter, spring and fall, it’ll keep for four to five days easy.

I know you might not believe it. But try it, and you’ll see.

So, who wants to be brave and be the first to try this and provide some feedback? 😉

Categories: Coffee, How To, Recipes | Tags: , , , , | Leave a comment

How to Properly Freeze Fresh Wild Mushrooms

You will need:

1 large cookie sheet
wax paper to cover cookie sheet (optional)
Ziploc sandwich bags and/or gallon sized bags for large quantities.
fresh mushrooms

TO FREEZE:

First, clean and rinse the mushrooms.
Cut them into the appropriate sizes for whatever you plan to do with them, if they are very large or dense mushrooms, such as a giant puffball. In which case you’d want to make slices that were ¼” to ½” thick.

Oyster mushrooms can typically be frozen whole, as they thaw very nicely, and one large one is usually enough for an entire dish. The wax paper is good for these, otherwise they will stick to the cookie sheet. Toss the whole sheet in the freezer. Once they are completely frozen, you may now bag them in the Ziplocs. Gallon sized bags work well for this if you have a lot, as the mushrooms will be individually pre-frozen and won’t stick together.

I typically cut large mushrooms into halves or quarters. If I know what I am going to be using them for, before hand I don’t worry about using the cookie sheet and wax paper, and I just put them into the Ziploc baggie as it. Smaller specimens can just be frozen whole.

TO DEFROST:

Place the mushrooms in a bowl of cold water for about 15 minutes.


When they are mostly thawed, you can then slice them as you normally would for whatever dish you are preparing.


Cook them as you normally would…

And your favorite dish comes out just as tasty as if you were using the fresh mushrooms!

Pictured is Macaroni and oyster mushrooms with wild garlic, dandelion and chicory greens. Delicious!

Enjoy!

This and all future How-tos will be cataloged under the ‘How-to’ tab up on the top menu bar.

Categories: How To, Mushrooms | Tags: , , , , | 1 Comment