Recipes

Brined Pork Roast and Mashed Potatoes

I’m currently taking Thomas Keller’s MasterClass on cooking techniques.

Even though it’s not technically ‘wild’ cookery, I figured I’d share some of the excellent tips, tricks, and dishes that I’ve made, and will be making here.

The first one is not in the MasterClass and is something I whipped up myself after scouring the net on a ‘how to’ properly brine a pork roast. After sifting through a bunch of garbage, I found a simple way that works, which I’ll be sharing with you below.

Tonight’s supper:

Brined_Porkroast_Potatoes.jpg

Brined Pork Roast and Mashed Potatoes. Reviews: “Succulent.” “Delicious!” “The best pork I’ve ever had!” And my favorite from my daughter: “Even better than the eggplant and garlic confit!” High praise, as that was her favorite dish ever before this. 😀

Everyone has their own way of doing this, this is what works for me. Feel free to adjust any recipe to your own preferences, as they are general guidelines only.

Everyone can figure out the mashed potatoes part with a simple internet search, so I’m just going to roll with the brined pork.

You will need:

(Brine stage)

A pork roast

1 gallon of cold water

1 dry measure cup of kosher salt

A big fricking mixing bowl and lid/plate to cover it. OR Aluminum foil.

A wooden spoon

Instructions:

This is going to brine for ten (10!) hours. Plan accordingly.

Pour the gallon of cold water into the mixing bowl, then dump the cup of kosher salt into it.

Stir until it’s 100% dissolved. If you have a kid who likes to help you cook, they’re great for this whilst you do other prep. Just have them stir SLOWLY.

Take something slim and pokey (a meat thermometer works great for this) and perforate the hell out of your pork roast on all sides, penetrating at least halfway though the meat. If you don’t have at least 50 holes on each main side of the roast, you aren’t trying hard enough.

Cover the top with lid/plate/aluminum foil.

Wait 10 hours. If you eat supper at 5 PM, yer gonna want to brine this about 6 AM.

You’ll need that extra hour for other prep.

(Cooking stage)

A 10” skillet or frying pan

Canola oil

Kosher salt

Cracked black pepper.

A roasting pan and roasting rack (A cookie sheet and cooling rack inside the cookie sheet work great for this!)

Preheat the oven to 350 degrees Fahrenheit/177 degrees Celsius.

Coat the bottom of your frying pan in a thin layer of canola oil, and set to medium high.

Heat until the oil reaches the smoke point.

Put some paper towels down on a cutting board.

Pull the roast out of the brine, rise thoroughly in cold water, then place on the paper towels, and pat dry with other paper towels. Move the roast to a plate to stage it, and replace the now soaked paper towels on the cutting board with new ones, and replace the roast on the cutting board on the new paper towels.

Let the roast set for 1 hour to come to room temperature. This is VERY important for even cooking and no weird under cooked spots in your roast.

(1 hour passes…)

Remove the paper towels from the roast, pat dry again with a new paper towel.

BPP_Set.jpg

Place the roast directly on the cutting board and season lightly with a dusting of kosher salt and cracked black pepper.

By now your oil should be hot and almost smoking.

Carefully put the roast into the pan and sear it. This will only take a few minutes. Flip it over and sear the other side.

(Searing the meat will lock in some of the moisture when you roast it, as well as make a lovely outer finish on the roast.)

When it’s seared, move the roast from the frying pan/skillet into the roasting pan and then into the oven it goes.

Depending on the size of the roast, you’ll need to adjust the cooking time.

The FDA changed their pork safety guidelines quite a few years ago from 160 to 145. I typically cook it to 150, though that may be more than necessary. It’s lovely at 135 too.

We’ve all been eating overcooked tough pork all our lives, and it’s such a wonderful meat when properly prepared.

I made two roasts and one was significantly smaller than the other. The smaller was done at 35 minutes, the larger at about 50 minutes, with an internal temp of 150. Be sure to stick the thermometer into the largest portion of the meat.

BPP_Done.jpg

It’s pink, and it’s supposed to be! It’s also tender, juicy, and delicious. As long as your meat thermometer read 145 degrees, you are 100% safe. Enjoy pork as it was meant to be enjoyed… juicy and delicious.

Plate and enjoy!

Or, if you’re like my daughter, have fun with your pork and potatoes!

BPP_Skull.jpg

More to come soon!

As always, I can be reached at Wildcookery@yahoo.com

Categories: How To, Modern Cooking, Recipes, Uncategorized, Wild Cookery | Tags: , , , , | Leave a comment

Spring Greens Medley!

Springtime means fresh Spring greens. And fresh Spring greens means FOOD!

I did make a smaller dish a few days earlier, but this is the first real, substantial, spring greens dish of the year, so I went all out and gathered a nice medley to mix and prepare for the family, and to share with you.

The following went into my Spring Greens medley.

(Click pictures to enlarge.)

Wintercress – Barbarea vulgaris, is a member of the Brassicaceae family.

Wintercress

Raw, they are a bit bitter and so-so. Cooked, they become absolutely mouthwatering. This was definitely the champion green of the dish. Everyone raved about it. It really does become a foundational green when boiled, but with a very delicate and delicious flavor.

Garlic Mustard – Alliaria petiolata, is also a member of the Brassicaceae family.

Garlic Mustard 2

Raw, they are a bit meh, in my opinion. Cooked they become less meh. Good, but not as good as Wintercress. 😉 The stems can be stout and a bit stringy as they grow, so take only the first few top inches of the stem. Unless of course you don’t mind the stringy aspect. It all cooks down fairly well when boiled for a few minutes.

This is the amount of Wintercress and Garlic Mustard I collected to use for the meal I made. A lovely mess of greens, isn’t it?

Mess of Greens

Wild Garlic – Allium Canadense.

Wild Garlic

I like to use the greens from these more than the bulbs. The bulbs will grow new greens, and I rotate the area I collect from so as to be sure to never over-harvest. As such I’ve maintained (and expanded) my patch of wild garlic exponentially over the past few years. All the garlic taste you love, with none of the commercial product’s signature ‘garlic breath’.

Dandelion – Taraxacum Officinale

Dandelion

What wild spring greens dinner would be perfect without a little bit of dandelion? I gathered a whole decent sized plant from the tip of the root up, and it was enough to impart it’s goodness to the whole dish. Every part of the plant was used and later chopped up. Leaves, buds, crown, and a tiny bit of the root. Delicious!

Thistle – Cirsium spp.

Thistle

An ‘unknown’ but delicious thistle made it into my Spring Medley. I say unknown, although that’s really not the case. I’ve been eating it for over 30 years, and my father ate it for 50 years before that. I just don’t have the stupid Latin name for it pegged as of yet. More on that later.

So, the wifey and I took a nice little walk and collected these greens as we went. It’s mighty handy to carry a plastic grocery bag in your pocket, and a folding pocket knife. You never know when you are going to run into wild food that you want to bring home with you!

This is a picture of all the greens that went into the dish:

Greens Board 2

The greens (sans wild garlic) were boiled for a few minutes. I boiled them longer than I would have since they were a ‘mixed’ greens, and some were more bitter than others. Probably about 10 minutes, tops.

The garlic greens were chopped and sauteed first, and then the boiled greens were also chopped and sauteed in some olive oil, and given a dash of ancient sea salt and cracked black pepper. The meat was given identical seasoning in it’s own separate pan. The key here is to not overcook the meat, and to use a lid so that it comes out nice and tender.

I call this dish, ‘Brassica and Bambi’.

Brassica and Bambi

Delicious was not even the word for it. It has to be one of the top five meals that I’ve ever prepared, in any medium, wild food or otherwise. Mouth watering delicious. Almost better than sex, delicious. Yea, it was that good.

Total cost? About $1 worth of rice and 75 cents worth of salt, pepper, and olive oil. And that’s to feed three people. Otherwise, free. The bambi was donated by a friend specifically to give this dish a more ‘wild’ aspect. Thanks M! 🙂

Thistles, Continued.

For those who are interested, regarding the prior unknown thistle, read on. Otherwise, the article ends here. Thanks for reading! 🙂

When is it OK to eat an ‘unknown’ plant? When the only way that it’s unknown to you is that you don’t have it’s specifics tacked down, but in which there are no non-edible or toxic family members or toxic look-alikes. In other words, if the whole family of plants is ‘safe’, then it doesn’t really matter much, now does it?

I’m not ashamed to say I haven’t really cared enough to narrow this thistle down to a specific species. Mostly because I truly don’t care. Not even a little. It’s food. End of story. I have bull thistles in my yard (Cirsium vulgare.) This isn’t one of those. I originally thought that it could be a Cirsium edule, but those are supposed to be confined to the West Coast, and now that I’ve actually found pictures of what the leaves look like, they look nothing like Cirsium edule. Pictures of anything other than a bull thistle are very hard to come by. It could be what they call a ‘pasture thistle’, but the bottoms of the leaves aren’t silver, just kind of green and shiny. Oh well… It would be much easier to ID if it actually bloomed, but it’s kind of hard to tell when the idiot city comes along and mows them all to the ground before they have a chance to flower. (They tend to grow along the SIDES of the fields, not so much IN the fields proper, around where I live…) However, all true thistles are equally edible, and this is a true thistle. Beyond that, the specifics are strictly academic and don’t really interest me. That might be an odd statement for a forager to say, especially from one who is usually interested in the academic end of things, but it’s absolutely true.

Basically, I think we tend to over complicate things when it comes to foraging. As I’ve always said, the Indians didn’t differentiate between different edible plants of the same species unless there was a real need to do so. If it was edible, that was that. Maybe one was choice and one wasn’t, and they’d certainly have had a preference if that was the case. And they’d know if one was ‘toxic’ and to avoid that one.

But they would not have cared one whit to differentiate between thistles that were all equally edible, and in my experience, pretty much all taste quite similar.

So, who am I to do so? Unless something is going to damage me in some way, I don’t care about the useless nuances.

Let me give you a modern example:

Do you really give a rip about the differences between a Fiji, McIntosh, Granny Smith, Red or Golden Delicious apple at the store, other than perhaps the difference in taste? No, you don’t. You don’t give a rip about it’s Dead Latin hoity toity name. In fact, not one in a hundred thousand of you could tell me that apples are Malus and pears are Pyrus. You know it’s an apple, and all apples are edible, and that’s about as far as your caring goes.

Doesn’t sound so strange when you look at it from that point of view, now does it? 😉

However, if anyone actually knows what this thistle is, I’m all ears. Or eyes, as it were.

(And I’m talking about actually KNOWS from hands on, REAL, personal knowledge and experience, not looking it up and best guessing using some friggin’ ‘key’ and saying… ‘Gee, I THINK it kind of looks like this one…)

So, if you’ve been eating this thistle, and know for sure what it is, send me a line. I suppose that finally knowing the official name for this thing would probably be better than calling it ‘unknown thistle’, as I tend to use it quite a bit, and it does grow quite prolifically around here.

Categories: Food Health, Foraging, Nature, Nature Photos, Organic, Organic Gardening, Organic Meat, Plant Photos, Preparedness, Recipes, Survival, Wild, Wild Cookery | Tags: , , , , , , , , | 1 Comment

Wild Cookery Forums are now LIVE!

Wild Cookery Forums are now LIVE!

I am proud to announce the official launch of the Wild Cookery Forums!

The forums may be found at: http://wildcookery.prophpbb.com/  http://wildcookery.freeforums.org/

Freeforums

This forum will be what YOU, the members help make it into. It’ll grow along the lines of your contributions.

This is your chance to make forum and Foraging history and create something great from absolutely nothing.

It’s also your chance to get in on the ground floor as a founding member of one of the very few Foraging forums in existence. This means that you’ll have a say in the direction of the forum, and can help make it into the kind of forum YOU’D like to see!

New boards can and will be created upon request, and if you have a specialized interest that you’d like to see represented and discussed, we can create a board or sub-boards to cover that.

*Please note that this forum will be geared to adults 18 years and older, and you must fit that category in order to officially join as a member. If you are under 18 you are still welcome to come and read the forum, as the content will be mostly publicly available, assuming that you have the express permission of your parents or guardians to do so.

The first thing after signing up would be to go to the Announcements and Updates page  and read the very brief documents listed there. That would be the Member Agreement, Moderation Policy, Legal Disclaimer, and FAQ.

Don’t worry, as I said, they are all very brief and straight to the point. No wall of text to read.

After which, if you plan on posting pictures to the forum, you can read the tutorial that I created on how to do that, here

Be sure to stop by the member’s only area Wayfarer’s Inn  once you have signed up and introduce yourself! 🙂

I hope to see you all there! 🙂

Categories: Food Health, Foraging, Nature, Organic, Recipes, Wild | Tags: , , , , , , , , , , , , , , , | Leave a comment

Roll the Bones, and Chew the Fat.

Modern ‘Americans’ are very strange and illogical creatures, I’ve noticed.

Something I noticed a long time ago, is that people don’t typically eat their fat. Nor do they usually use the bones from the animals, if they cook. Years ago folks used to save the bones, freeze them, and make soup stock.

Wild Cookery

By and large folks don’t do that anymore. So all those bones go straight into the trash heap. When I was growing up, used bones would go into the compost pile and make their way back into nature that way. These days everything goes directly into a plastic trash bag, into a plastic trash bin, and out to the curb to be buried and/or incinerated somewhere.

But that’s such a pitiful waste of resources.

Now, I’m all about making the most of using resources that would otherwise be wasted. Especially if it’s darn tasty.

Some of the best beef stew I’ve ever made was from leftover t-bone steak bones, so a few years ago I had an idea. My idea was to ask my friends and neighbors to save something that they’d typically throw away, the fat and bones.

I’m not talking about bones that are gnawed upon or any such thing, just bones that have had the meat mostly cut off of them, or fat that has been pre-cut off of a steak or what have you prior to eating it.

No cross contamination, no gross factor.

But people wouldn’t do it. Not even people that I’ve known most of my life and who know I live a foraging lifestyle. It puzzled me.

I even offered to pay them for it, to cover any inconvenience they may incur by having to throw a few scraps in a bag in the freezer. I told them that I’d give them a few bucks for every bag of bones and fat scraps they saved for me. That only made things worse, I think. Some people got almost violently confrontational when asked why it bothered them to be asked to save bones and scraps.

Not one could give a logical, rational answer.

I think that ‘modern’ people seem to think that such things are beneath them. I mean from the way they reacted you’d have thought that I asked them to bag up their daily poo and put in in the freezer for research.

But just asking folks to kindly save a few bones and scraps? People don’t know how to react to that. They freak out.

You’re asking them for something they are going to throw away anyway, and for some reason they’re too embarrassed to give it to you. Or maybe they’re embarrassed for you that you’d ask them to save ‘scraps’ to be utlized and then consumed. Who knows.

What a strange and wondrous world we live in.

Unbeknownst to these people, they’re consuming the worst part of the animal (the lean meat) and throwing away the best part. (The fat and the bones.)

In times past the bones were used to make bone broth for soups, and the fat was simmered in the soups until it broke down and imparted it’s greasy goodness into the whole pot of soup. And when some bones such as chicken bones, are cooked for several days, they become very soft, and can then be safely consumed.

Easter will be coming up soon. Every single one of my neighbors will be buying, and preparing, a ham for easter. Every single one of them will be throwing away that lovely ham bone. I could have a baker’s dozen hambones in my freezer from other people throwing them away. That would last me a year of ham soup if I made it once a month. But not a one of them will give it to me. I might actually use it to make soup or something and they’d apparently rather it rot in a landfill.

But what’s the answer to this dilemma? I don’t know. How do you change the American mindset? I don’t think you do. Not unless something very drastic were to happen to the food supply.

But barring that, hopefully people will one day soon feel an urge to get back to a less wasteful way of life, where if they don’t use those precious resources themselves, they aren’t all weirded out about giving them to a neighbor so that they may be made use of instead of shucked into the trash can. These things run in cycles, and our current way of life is simply unsustainable, and will eventually come back to true.

Categories: Food Health, Foraging, Nature, Organic, Recipes, Wild | Tags: , , , , , , , , , , | 3 Comments

Soup, Glorious Soup!

Instead of listing a zillion soup recipes, I’ll just start with a base recipe that I use, along with some variants that I use depending upon the season.

Wild Cookery
WINTER: Winter is the heaviest soup season for me, living where I do in the frozen Northeast. In the winter I’ll typically leave a pot of soup on ‘warm’ heat all day long and then shut it off at night. Normally when it’s cold enough out I can just put the whole pot of soup in the breezeway and it keeps it below 40 degrees same as the fridge would. Hearty soups are the name of the game here. I tend to put some meat in every other pot I make. I put everything in one pot, except the rice, which I make and store separately, and add it to each soup bowl, and then ladle the soup on top of the rice. This keeps the rice fresh and doesn’t turn my soup into a starch-fest.

SPRING: Spring is still pretty good soup season. Especially once the wild garlic, garlic mustard, dandelions, and other spring greens start popping up. I still use meat in my soups in the spring, but to a lesser degree than in winter. I tend to switch from beans to lentils during this time period.

SUMMER: Summer is the least soup-y season for me. Though I do still make wild greens soup from time to time. When I do, I don’t usually add meat to it, and I make it into a much thinner soup. It’s typically pretty hot here during the summer, and I don’t like eating hot and warming foods like soup when it’s hot. Also soup doesn’t keep well on it’s own in hot weather, and spoils rapidly, and thus has to be independently refrigerated, taking up a large amount of room in my fridge.

FALL: Fall is when soup season starts to kick in again. Usually the end of September or the beginning of October. During this time-frame I switch back from lentils to beans, to make the soups thicker and heartier. I also start adding meat back into the soup on an increasing basis until eventually it’s every other pot or so.

Ingredients:

  • Water
  • Ancient Sea Salt. (Don’t skimp on this, and don’t use that white toxic iodized crap you find at the store. If you can’t find Ancient Sea Salt, use Celtic Sea Salt.)
  • Potatoes (or any other starch veggie you like. I’m on a budget, and it’s winter, so I use potatoes.)
  • Veggies. This can be anything you like, but should include at least one onion. I typically use an onion, 3 carrots, and 3 stalks of celery, as a base. Cabbage and wild greens are added when available or in season.
  • Rosemary. I use dried, though I suppose you can use fresh if you have it on hand. Nearly anything can be made tasty with enough rosemary.
  • Beans. I use pinto beans, kidney beans, or whatever is on hand. I buy bulk 20 pound bags.
  • Meat. Again, whatever you like. With bones is preferred, but any meat will do. Including and especially wild game. Deer, squirrel, rabbit, whatever. Toss it in there.

How to make real basic soup:

All of my soups start with a big soup pan. I like soup, and I make enough so that it lasts my family several days at a time. You can make less or more as you desire, but the method is identical. Start with cold water, and add the salt. (See below.)

Also, be sure to use a lid with your soups. It preserves your nutrients. With a lid the evaporate turns into condensation on the lid, and will slink back into the pan when the heat is shut off. So nothing is lost. It’s making the most out of a limited resource.

I then add 1/2 of a standard coffee cup of ancient sea salt directly to the water. I know how much salt I like in my soup. You can add more or less to taste. I’d start with less and see how you like it. You can always add MORE salt. You can’t un-salt something without adding more water to it however, and it’s easier to add more salt than to try to dilute something which is uber-salty. Heat the water to boiling. I typically put my pot on 6 on a scale of 10 to do this. Add the dried rosemary. I’d say about 2 tablespoons, though I just pinch it in myself. Don’t worry, it’s not overkill. Trust me. Rosemary is a good thing.

Now that the water is doing it’s thing, you can add some of the veggies. I add the potatoes first. I use 3 – 5 potatoes, cubed into small pieces. Probably 1/4th of an inch across. You can go larger if you like. Next add the onions, sliced and then cubed the same way. Then the carrots and celery. I cut the carrots in half lengthwise, and depending on size, half again lengthwise. Then chop as you did the onion and follow suit as you did with the potatoes and onion. Celery is done the same way, except that you don’t need to cleave it in half first, as it’s a stalk and not a root veggie. You can usually get three strips out of a large celery stalk. Chop semi-finely.

I then add wild greens if available. This can be anything you like. I typically use dock, dandelion, plantain, wild garlic, thistle if available, and sometimes a little bit of garlic mustard. I’ll throw in anything that’s in season though, from fiddleheads to violet blossoms and leaves. If it’s edible, it goes in the pot.

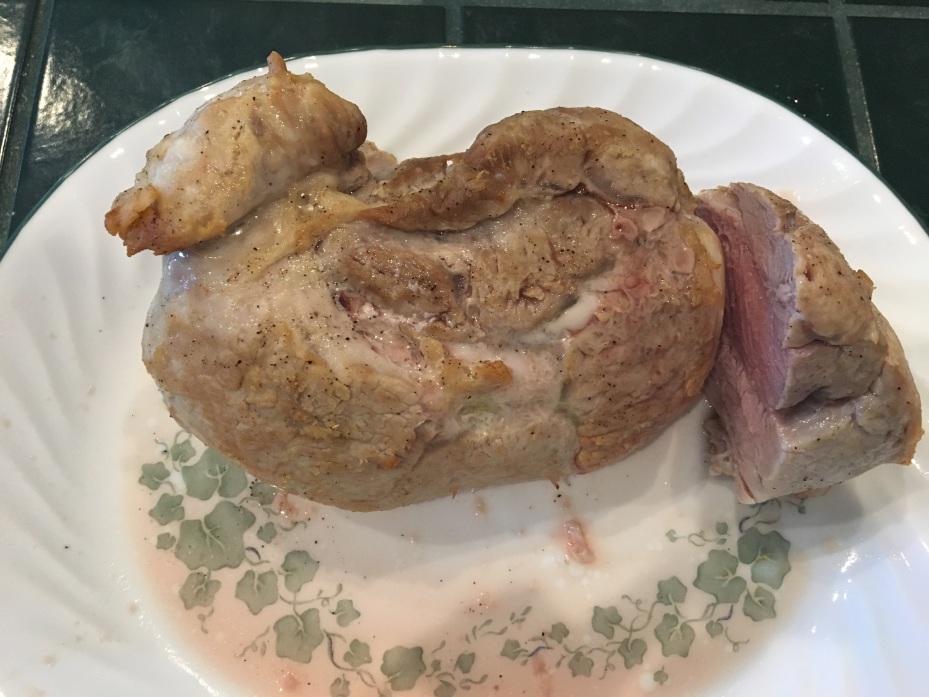
Next add the meat. Mine is usually frozen, so I add it last, as the soup will take a while to boil again after you add all those veggies. Once it’s going good again, just add the meat whole whilst still frozen. I get my meat bulk and then I re-wrap it in freezer paper so that I can add it to soup without messing with it. I just open the freezer paper, extract the meat from the waxy surface, and in the soup it goes. Ground meat works especially well for this. If you use ground meat, you’ll need to pull the meat out of the pot after a few minutes and chop it up fine with a knife on a cutting board.

If you use boned meat like chicken, or more solid meat, like a chunk or roast, once it’s cooked and falling apart or off the bones, you’ll need to pull it out of the soup and flake it with a fork. I use two forks. One to hold, one to flake. Then bones and meat all go back in the soup.

The last thing that goes in, is the beans. If you knew you were making soup the night before, you can soak your beans in a pot of water overnight, drain, rinse, and then add directly. Or you can speed-soak them. This involves boiling a pot of water, adding the beans, boiling them for a few minutes, shutting the pot off, and letting them sit for an hour or so. Then drain, rinse if desired, and add to soup. If you do it this way do it BEFORE you start your soup, so the beans will be on hand and you won’t have to wait an extra hour for nothing.

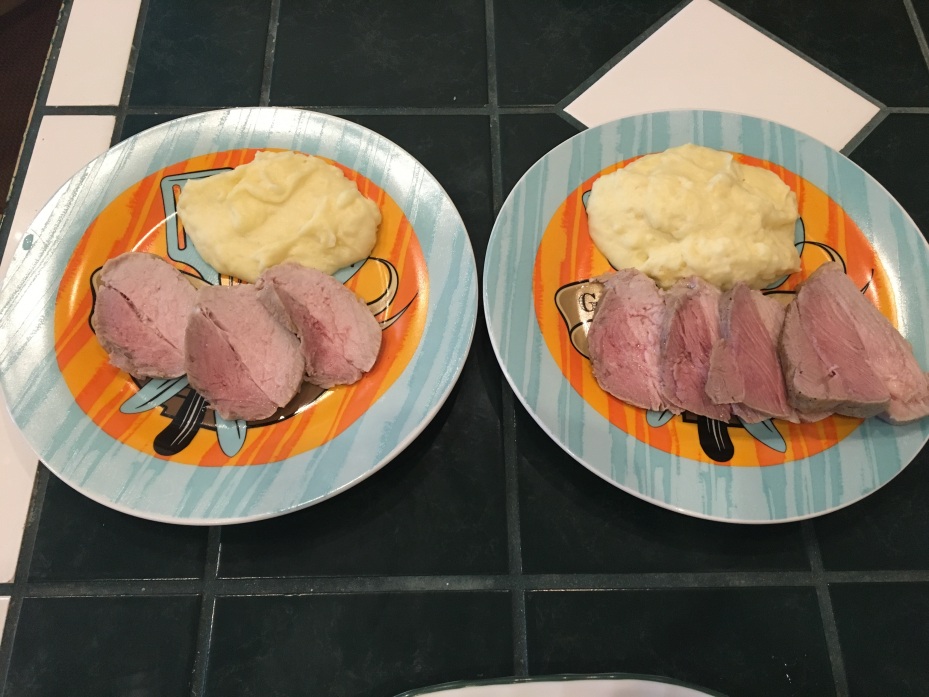
An hour or so later, it’ll be done and ready to go. I serve mine over rice. I make the rice separately though, that way the soup pot at large doesn’t get all ‘starchy’. I think it tastes much better this way.

Some additional soup ideas…

You can also sometimes take your leftovers and turn them into/add them to soup. This not only saves you a huge amount of time and effort in preparation, but makes the most of your resources in these economically shazzy times.

An example:

I visited a friend last year who was new to foraging. They were interested in seeing how it could be incorporated into their daily life, so I proposed a little game during our construction of dinner.

The game was that the meal could only contain ONE item that was store bought and not foraged for. The leftovers would then be made into soup the next day. Cooking oil and basic spices not included. (In other words the olive oil and salt and pepper didn’t count.) I buy my ancient sea salt in bulk in 20 pound bags, and I buy my peppercorns in bulk as well. You should have enough of both on hand to last you a year of daily cooking use, and you can acquire such for about $30 or less.

Day 1: The Meal

First I put some olive oil in a frying pan, cubed up three medium sized potatoes. The potatoes were grown from their garden, so they were an allowed ingredient. After the potatoes were almost done, I added some lovely boletus that I found growing on the property, chopped and cubed into small pieces. In a separate pan, also with some olive oil, I put in some frozen deer meat that my friend supplied from their hunt the prior year.

(Thankfully they had the sense and skill to clean their own deer. I had actually helped them with it, as they were going to take it to a butcher. I said… “Butcher? PFFT. C’mon son, it’s time you learned a thing or two…” And so I showed them how to cut up and package a whole deer into nice little freezer sized packages. It’s amazing what you can do with a sharp knife, masking tape, and some freezer paper. They were amazed that I didn’t need a saw and processed the whole deer with just a single knife, that I sharpened a few times as I went. Flabbergasted, even. Some people’s kids, I tell ya. 😉 )

Anyway, they had some of that left, so we took a little over 3/4 of a pound of neck meat strips, thawed them out, cut them up finer, and then added them to the pan.

This in turn, was served over a bed of rice. It was delicious. You carb conscious folks are probably going ‘Ay-yai-yai-yai-yai!’ right about now. Whatever, you eat what you eat, I’ll eat what I want to eat. It’s all about moderation what what your diet consists of. Different folks require different amounts of certain things. I used to think that I was a ‘protein’ type, but I later found that’s not the case with me at all. If I eat more than a certain amount of meat, I start to feel less than well and have difficulty digesting, and passing, said meat. So, I include meat in my diet, but as part of a balanced whole. Oh, I’ll nom a steak from time to time, no doubt. But I don’t eat meat products for breakfast, lunch, dinner, and snacks like half of America does.

That being said, I do luvs mah bacon. 😀

I don’t have issues digesting bacon. Only denser, more solid meat. Like if I have meat for lunch, and then a big steak for dinner, digestive problems are in the forecast for the next morning, guaranteed. Maybe it has something to do with the fat content, or lack thereof. I always eat all the fat on all the meat I consume. It’s good for ya. Moreso than the meat, in fact.

But I digress…

Day 2: The Soup

What we had left over was probably one bowl’s worth of meat, potatoes, and mushrooms. Even with rice, that’s not enough to feed several people a second time around.

So, it was soup time. Also, as part of the rules, ‘leftovers’ do not apply. All leftovers are fair game, and any quantity may be used, as it is considered making the most of otherwise wasted resources. Feel free to mix and match if you have numerous leftovers available from numerous sources.

First off I went looking in their yard for what I could find. I came back in short order with a few big leaves of dock (Rumex obtusifolius), a big fistful of dandelion greens, some plantain, a small handful of violet leaves, a whole small thistle plant complete with root, and a few bulbs of wild garlic. This took a whole 5 minutes or so. They were shocked that all this food was just sitting there in their yard, and that they mowed it down, weekly.

It took longer to clean the stuff than it did to collect it.

It all got chopped up and added to the soup. Except the thistle root. That was put in whole as it was a bit woody, and later removed and discarded after the outer layer had turned smooshy and left only the woody core.

The leftovers from the prior day were then added directly to the soup. (This would be the deer, boletus, and potatoes)

I then took a half pound package of the toughest neck meat they had left in the freezer and put it in the soup. (Following the basic soup instructions above.) It cooked for about 3 hours total.

The deer meat came out more tender than the finest fillet mignon I have ever had. And this is from a ‘tough’ cut of meat that most would have ground into burger. It’s all in the preparation. It literally was so tender that it melted in your mouth. And the flavor was incredible.

As usual, I served it over a small bowl of rice. The folks I made it for proclaimed that it was the “Best GD soup I’ve ever had.” And GD didn’t stand for “Green Deane” in that instance. 😉

It’s amazing what you can do with nature at your doorstep, and otherwise wasted leftovers.

Thus, I am a big proponent of soup. We could feed the world with soup. Or at least, all of our family and loved ones, no matter the economic circumstances.

It’s the difference between surviving and thriving during tough times. If you can thrive during the worst of times, you’ll do incredible during better times.

Categories: Nature, Preparedness, Recipes, Wild | Tags: , , , , , , , , , , | 3 Comments

Thanksgiving Dinner 2012

I decided to make a big ‘ol chicken instead of the 12.5 pound turkey. I’ll save that sucker for Christmas! 😀

So, I roasted the chicken for about an hour and 45 minutes, and halfway through, I put some olive oil on the skin, which kept it from burning, and made it nice and crispy. Yum!

I also made from scratch mashed potatoes with the skins on them, which in my not so humble opinion, is the ONLY way to mash, along with home made stuffing from home made bread.

I didn’t do the Hungarian parsley thing. I didn’t have any fresh parsley, and I was strangely out of dried parsley. For the life of me I can’t imagine where my dried parsley went, because I certainly don’t remember using it all. Oh well, chalk it up to gremlins.

So, I went for the next best thing in the stuffing world. Sage, rosemary and thyme stuffing! I cut my real, fresh, home made bread into thin slices, stuck it in the oven until it was dried and crouton-like, and then cut it into squares. I then mixed it with salt, cracked black pepper, the herbs, and 1/2 a stick of butter melted butter. Then squished it all together with my hands, put it into a glass baking dish covered with aluminum foil, and set it aside. I put it in the oven for the last 45 minutes of the turkey, so that it would all be done at the same time, along with the mashed potatoes. For ‘gravy’ I just used dripping straight from the chicken roaster. It’s just as delicious, if a bit thin.

Then, to round it off, I opened up a can of peas and green beans. Yea, I know. I’m not big on canned stuff, but I bought these just for the occasion.

It was all delicious, but my wife agrees that the winner was the stuffing. It was hands down the best I’d ever made, and we’re both big fans of rosemary.

So, here’s a pic of what dinner looked like. Nothing fancy, just good food.

Categories: Baked Goods, Food Health, Holiday, Recipes | Tags: , , , , , | 1 Comment

Hungarian Turkey Stuffing!

This recipe isn’t my own, but comes courtesy of June Meyer.
It’s pretty much identical to what my grandmother used to make, and is absolutely delicious!

June Meyer’s Authentic Hungarian Parsley Stuffing for Chicken, Turkey or Veal

Enjoy! 🙂

Categories: Baked Goods, Food Health, Holiday, Recipes | Tags: , , , , , | 1 Comment

Fall Foraging

I made a big pot of my delicious trademark soup this afternoon. It takes a while, so it didn’t finish cooking until late this evening, but it was worth the wait.

The recipe is in the ‘recipes’ tab.

I found some Broad Leafed Dock, (Rumex obtusifolius) that was very nice, despite being late in the season. I chopped it up and into the soup it went.

Also, I found some Dandelion (Taraxacum officinale) and Plantain (Plantago). That went into the soup as well, chopped up.

I also added:

2 chicken thighs and drumsticks

5 small potatoes, cubed

4 carrots, sliced and diced.

a large onion, diced

half a coffee cup of real ancient sea salt (for the whole pot)

and two large pinches of dried rosemary

It was served over half a bowl of cooked brown rice.

It came out absolutely delicious. Seeing as how I hadn’t made soup for months, I almost forgot how good it was.

I was quite hungry, so I didn’t take a picture of the bowl of soup when it was done. But, it basically looks like any other real chicken soup, I’d imagine. I’ll try to remember to take a pic when I eat some again tomorrow, and update the posting.

Addendum: Added soup pic. YUM!

Categories: Food Health, Organic, Recipes, Wild | Tags: , , , , | 2 Comments

Cocoa Coffee Oat Sweet Bread

Wow! What a mouthful, eh?

Make this very hearty and delicious dessert bread and you’ll see that more than just the name is a mouthful!

Sundays tend to be my ‘lazy-days’, and every now and again I’ll bake something. This was such a Sunday. It’s also the day that I tend to eat whatever I want, whether it’s ‘wild’ or not. 😉

You will need:

A bread loaf pan or something similar.
3 cups of flour
1 cup of real oatmeal (rolled oats, not instant crap)
1 teaspoon of real salt
4 teaspoons of non-aluminum baking powder
3 teaspoons of real cocoa powder
1 cup dry measure packed brown sugar.
1/3rd cup of your favorite cooking oil. (I use olive oil or COLD pressed canola)
2 cups or so of your favorite prepared coffee, added a little at a time. I used organic decaf for this recipe. Kids can enjoy it that way without the caffeine.

If you need a good coffee recipe, go here.

Optional 1: If you aren’t a big fan of coffee, substitute water instead.

Optional 2: (but very good to have) A cooling rack, if you have one. If not, you can make one temporarily by removing a rack from your oven BEFORE it’s turned on, and setting it between two evenly spaced flat surfaces, or just set it on TOP of a cookie sheet. You will need airflow under your finished loaf for it to cool and set properly.

Set your oven to 400 degrees and grease your loaf pan.

I use a dab of olive oil on a paper towel to accomplish this.

Combine all dry ingredients except the oatmeal, and mix thoroughly. Now add oatmeal and mix thoroughly again. (It just works better this way as the oatmeal adds considerable bulk and you want the salt, cocoa, and baking powder to be very evenly distributed.

Add oil and then immediately add the coffee/water. Add about a cup and a half to start with and stir thoroughly. You should see when you need to add more coffee/water. Add enough water so that it is well mixed, but not ‘soupy’. If you’ve ever baked anything before you should know what you need to do. If you’ve never baked before, just make sure it’s not ‘runny’, but still well mixed and quite moist. This will turn out a bit thicker in consistency due to the oats, and they will absorb a lot of the coffee/water, so you may need to use more coffee/water than 2 cups. Use what you need.

Transfer the mix to your waiting loaf pan. Put a little bit of oil in the center of the loaf, and then make an ‘X’ with your finger. This will prevent the ‘crust’ of the loaf from cracking somewhere you don’t want it to, like the side or middle of the loaf.

Put the pan in the oven and set the timer for 40 minutes.

Go torment your cat with a laser pointer or catnip ball.

When the timer goes off, shut the oven off, and crack the oven door. Now set the timer for an additional 10 minutes.

When the 10 minute timer goes off, the bread is ready to be removed from the pan. I use a flat plastic frying utensil to get between the bread and the loaf pan. Go down on all four sides of the pan to make sure it isn’t sticking, then gently pry the loaf up a bit until you can tell it is free of the pan.

With a clean towel in your hand or an oven mit, turn the loaf from the pan over into your waiting hand. Place the hot loaf on the cooling rack to cool. After it’s cool, cut, slice, and enjoy. You can also enjoy a piece hot, but it won’t slice very well and if it’s not quite done yet inside you may ruin your enjoyment by getting a few ‘undone’ spots inside if you let all of the heat out of the loaf by cutting into it. I just let mine cool for about 30 minutes and then slice and enjoy. 🙂

Categories: Baked Goods, Coffee, Recipes | Tags: , , , , | 9 Comments

How to Make Darn Good “Old-Fashioned” Coffee

Yea, I know, it’s not ‘wild’. But it IS cookery! I use decaf organic coffee, so close enough. 😛

We’ve got a huge problem with most people not knowing how to cook these days. And it’s not their fault. No one took the time to teach them growing up. They were too busy having a ‘childhood’. Half the nice folks I talk to can’t even make real oatmeal… so here we go.

You will need:

1 medium saucepan with a lid.
Enough water to almost fill the saucepan (Leave ½” space at the top)
Your favorite ground coffee

Put the pan on the stove on medium. If you have 10 temperature settings on your burner, you’ll want to put it on a 4.

Immediately add 2 tablespoons of ground coffee to the water whilst the water is still cold. It’s very important to do it this way. You want to slowly ease the flavors out of the grounds. Not shock them. Cover the pan with the lid.

Now, you will need to attend this until you know how long it takes to boil. Approximately 15 – 20 minutes depending on your elevation. Resist the urge to put the temperature higher. You’ll just come out with crappy tasting coffee.

Now, let me define ‘boil’. Boil to me, in these coffee terms, is that bubbles are just breaking the surface. Not to be confused with a ‘roiling boil’. You aren’t making pasta here. If you can smell the coffee 4 rooms over, that’s all of your essential bean oils that are being burnt out of your coffee, and it is NOT a good thing.

So… watch your pot, and when it starts to bubble a bit, take it off the heat and set it on another burner for about 5 minutes. This will allow the grounds to settle so you can pour it off.

I pour mine into a conventional coffee pot. If you make coffee, you most likely have one of these somewhere. If not, use another equal sized or larger pan. Carefully take the lid off of the pan, being cautious not to burn yourself with the steam (IT’S HOT!) and SLOWLY pour the coffee into the coffee pot/other pan.

With practice you’ll be able to get 99% of the liquid out of this with zero grounds. But for your first try, don’t be afraid to leave some liquid in the pan, so as to be sure not to get any grounds in your coffee. The last thing you want your first taste is to get a mouthful of grounds.

Now, if you like sugar or milk in your coffee, add those as you normally would. I like to add 1 teaspoon of dark brown sugar or maple syrup to mine. It’s absolutely delicious.

Typical comments I get are “Wow!, all the bitter is gone.” And “If I knew coffee could taste this good, I’d have done this years ago!”

I’ve had people who couldn’t even drink coffee without a ton of sugar to mask the sucky bitter under-taste, go to drinking it this way… BLACK… because the vast majority of the bitter is gone. I’ve also had people who couldn’t even stand the SMELL of coffee before, (as it is typically acrid and burnt) turn into die hard coffee lovers.

Things like espresso machines totally ruin coffee. They burn the beans. The temperature is simply too high.

GOING BEAN (as opposed to ‘going green)

What would be more ‘green’ than recycling your coffee grounds? And by recycle I mean get some real use out of more than once?

Now, this isn’t the coolest part. Oh no. The coolest part is that you can re-use these grounds for about five days, and still get coffee that comes out almost as good as day 1.

Simply re-fill the pot with water to the previous level, put the lid on it, and put it back on the stove on the shut off burner. When you want more coffee, just turn the burner back on, add ONE TABLESPOON additional coffee to the existing pot, and prepare as normal.

The only reason I discard after five days is because the level of actual coffee goes down as the percentage of coffee grounds to water ratio rises. In other words, you get a little less liquid each day, because the space in the pot is taken up by coffee grounds.

The coffee doesn’t get yucky tasting under normal conditions. Though in the heat of summer I only keep it for an additional day or two if it’s really hot out. In the winter, spring and fall, it’ll keep for four to five days easy.

I know you might not believe it. But try it, and you’ll see.

So, who wants to be brave and be the first to try this and provide some feedback? 😉

Categories: Coffee, How To, Recipes | Tags: , , , , | Leave a comment